|
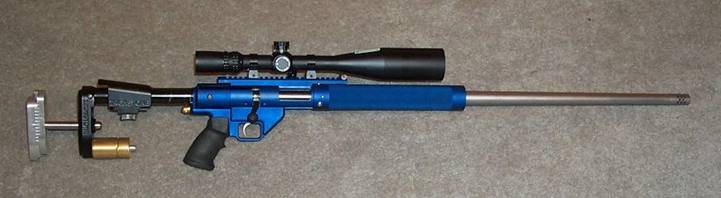
6.5-284
MAK TubeGun Target Rifle
Click For
Latest Updates
Completed 3/6/05
This rifle was a
multiple week project, most of which was spent building the
necessary fixturing and tooling necessary to do the action
blueprinting and the barrel fitting. All machining was performed
on a Grizzly 13X40 lathe, and a Grizzly 9X42 mill, by the
author.
The rifle was
chambered for Lapua brass. I expect to be using Lapua Scenar
bullets, in the 123 and 139 grain weights.
The specifications
are as follows:
|
Caliber |
6.5-284
Lapua Match |
|
Barrel |
Pac-Nor Stainless Super Match
grade, 29” finished length, 3 groove, 1 : 9” twist,
heavy varmint contour |
| Muzzle Brake |
Pac-Nor |
|
Reamer |
Dave Kiff of
Pacific Tool and Gauge – 6.5 X
284 Lapua Match, 0.297 neck, 0.120 freebore |
|
Receiver |
Remington M700 right hand short action. Receiver was
blueprinted; single point chasing of the receiver
threads, locking lugs, and receiver face. Bolt was
re-machined by truing the front and rear face of the
lugs, bolt nose and outside diameter, and bolt face. The
bolt had four small beads TIG welded where the receiver
raceway contacts the bolt body, which were subsequently
machined to provide 0.001” clearance when in battery. |
|
Trigger |
Jewel HVR |
| Stock |
Single Shot
TubeGun by
MAK Enterprises. Receiver is
bonded into the aluminum tube using J-B Weld epoxy |
|
Handgrip |
Sierra |
| Buttstock |
Ironstone competition model
with optional weights |
|
Scope |
Nightforce NXS 12-42X56 with
NP-1RR reticle |
|
Rings |
Leupold QRW high, 30MM |
| Weight |
19.5
pounds |
Performance
at 200 yards:
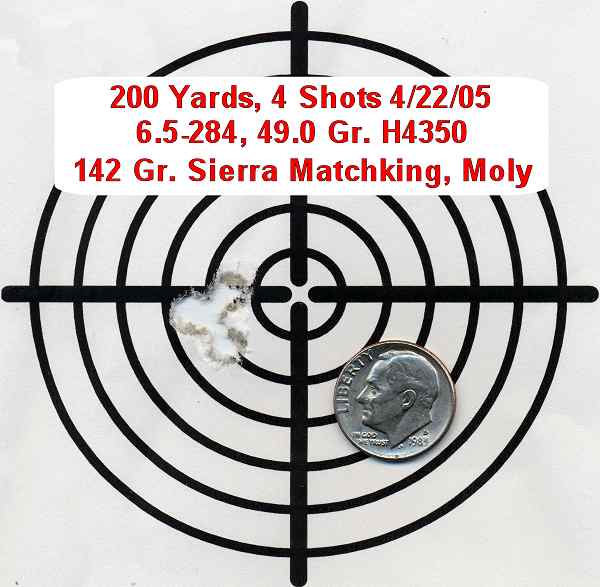
14 shots at 600 yards, windy conditions,
also 142 SMK/H4350 load as above:

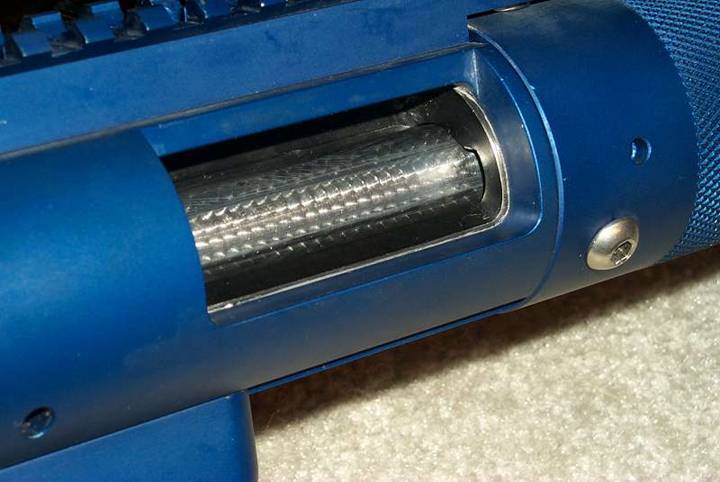
Fitting
the Bolt
As part of the action
truing process, I decided to ensure a tight fit between the bolt
and receiver by adding and machining four small weld beads,
instead of the traditional sleeving process. If the welds are
made at the right places, the bolt can move freely when
retracting the bolt, but will lock up with a near perfect fit
when in battery.
I started by very
carefully measuring the bolt raceway with a Starrett snap gage.
In particular, I was sure to measure the raceway at both bearing
points: near the bolt head, and back near the bolt handle. I
found nearly a 0.002” difference between the diameters in the
action. Once these were measured, checked, and recorded, I
proceeded to the welding process.
I welded a very light
bead on the bolt in the four places that will contact the
bearing surfaces on the action. I used my Miller TIG welder and
a standard S type steel TIG filler rod to make these beads. My
research indicated that welding CrMo (4140) type steel with S
TIG rod was OK. I was very careful not to touch the bolt lugs,
or to over penetrate. I just wanted to add a slight amount of
metal to allow the machining process to generate that perfect
fit.
After welding, I
mounted the bolt in the four jaw chuck using a spud threaded
into the back of the bolt (1/2” X 13 TPI), and a live center in
the firing pin hole in the bolt face. The bolt was trued in the
same way that is used when squaring the bolt lug contact points
and truing the bolt nose and face. I then carefully turned each
pair of beads, front and back, to the measured bolt raceway
diameter minus 0.001”. A very easy process, and it fits
perfectly. The final touch was to put a little 800 grit lapping
compound from Brownells on the back of the lugs and the bolt lug
ears, and gently lap the lugs to the receiver and the bolt
raceway. Just a few strokes did it, being careful not to get the
lapping compound on the round part of the raceway, just the lug
recesses and bearing areas.
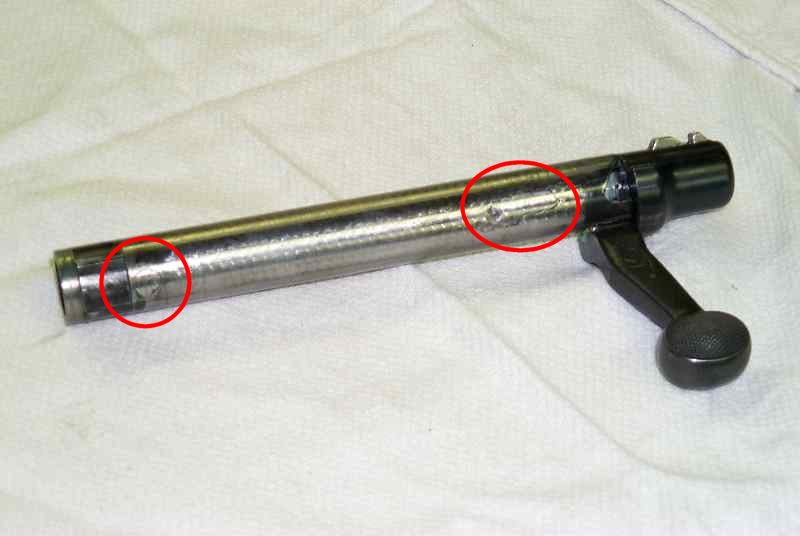
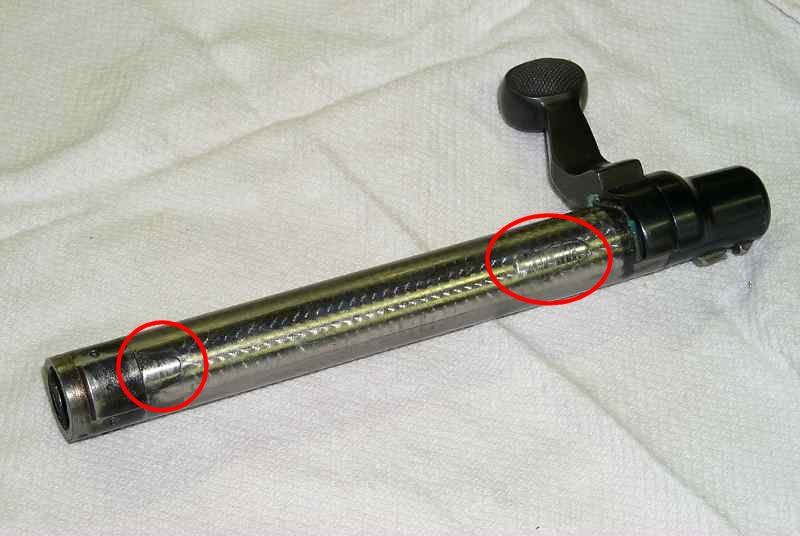
I jeweled the bolt on
my mill using a rotary table in the horizontal position, and a
Damascening tool from Brownells. Be sure to polish the bolt when
you are on the lathe, before the jewelling.
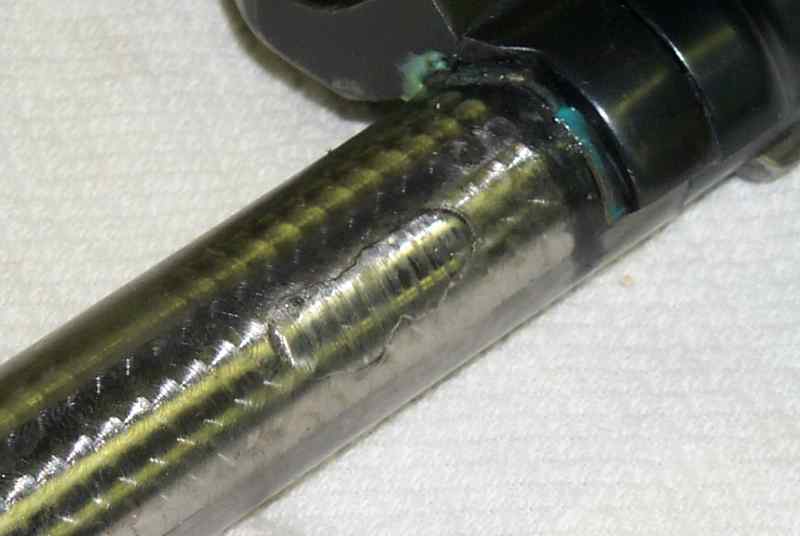
The pictures below
show the weld beads after machining:
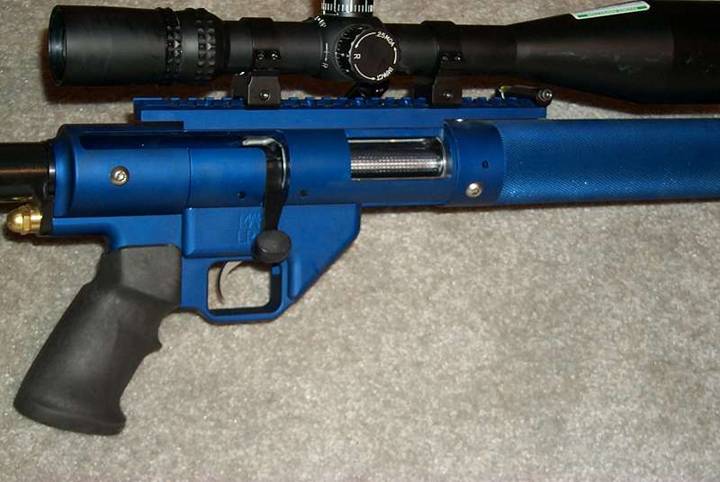
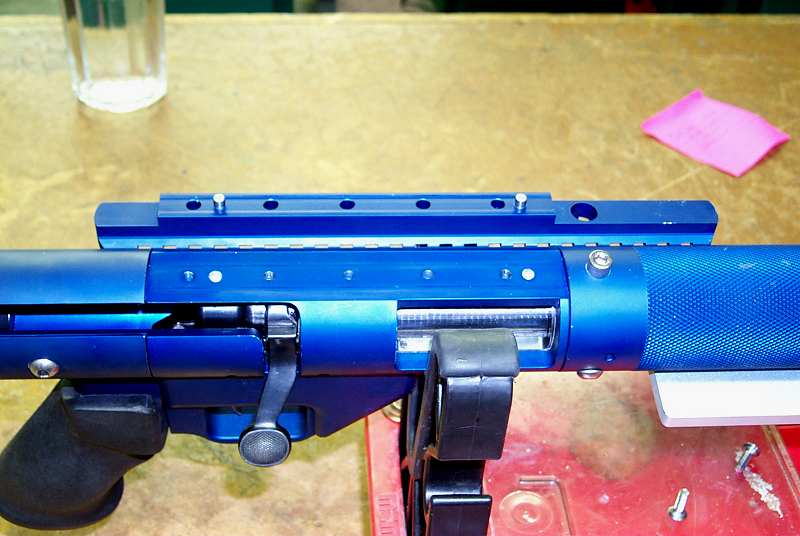
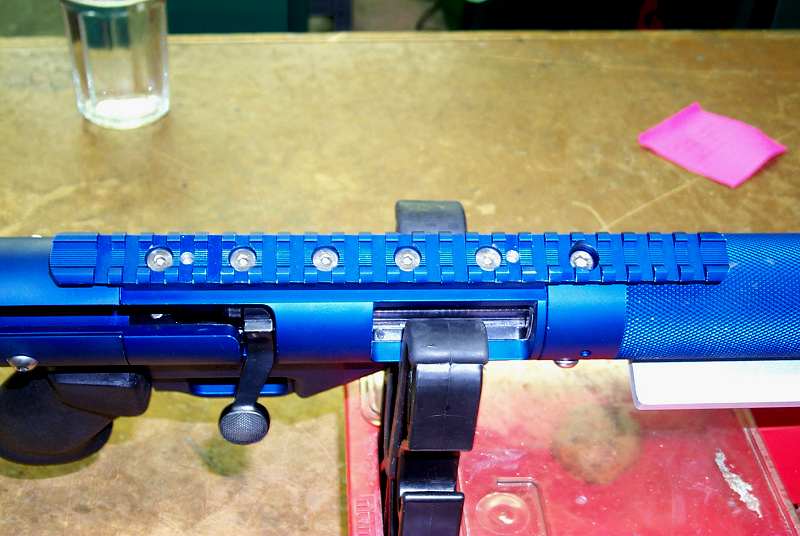
Pinning the Sight Rail
I had a real problem
with the sight rail on the receiver sleeve shifting around under
recoil given the weight of that Nightforce scope. The flat head
screws are not enough to hold it tight, so I added some 3/16”
dowel pins to take up the load under recoil. I can now remove
the scope rail and replace it without any change in zero.
Here are a couple
shots of the pinned rail:
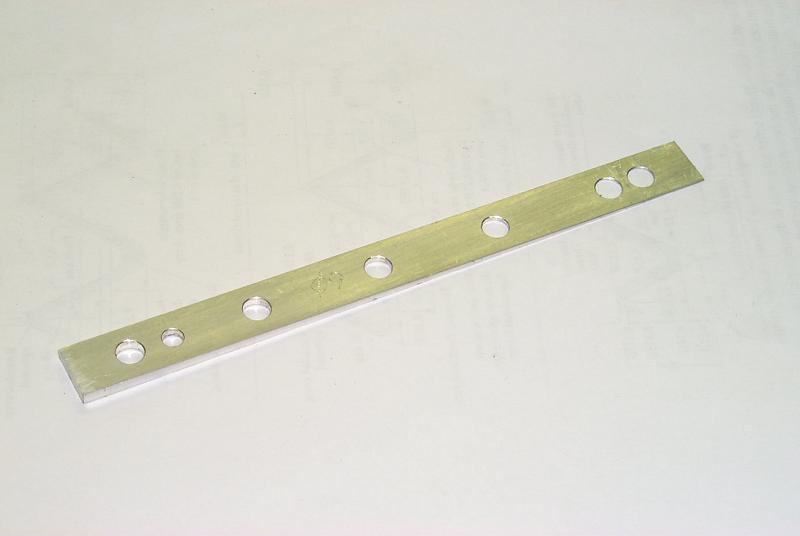
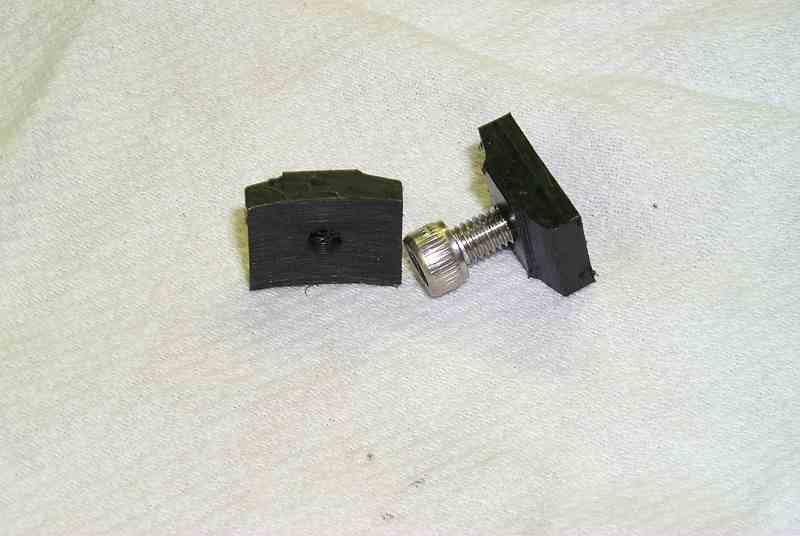
Tapered Sight Rail Wedges for
Long Distance Shooting
The tubegun is
primarily meant for use with iron sights, and has zero offset
angle in the sight rail. For long distance shooting, I needed to
add between 20 and 60 MOA in order to keep the scope within its
elevation adjustment range.
I designed and
machined these rail wedges, meant to go between the rail and the
receiver sleeve. It is machined with the required angle, and is
held captive by the rear dowel pin, between the rail and the
receiver sleeve. I machined it from 6061 aluminum. I actually
made three, one each at 20, 40, and 60 MOA. They can be added or
changed without loss of windage zero, due to the dowel pins.
Here is the 60 MOA rail:
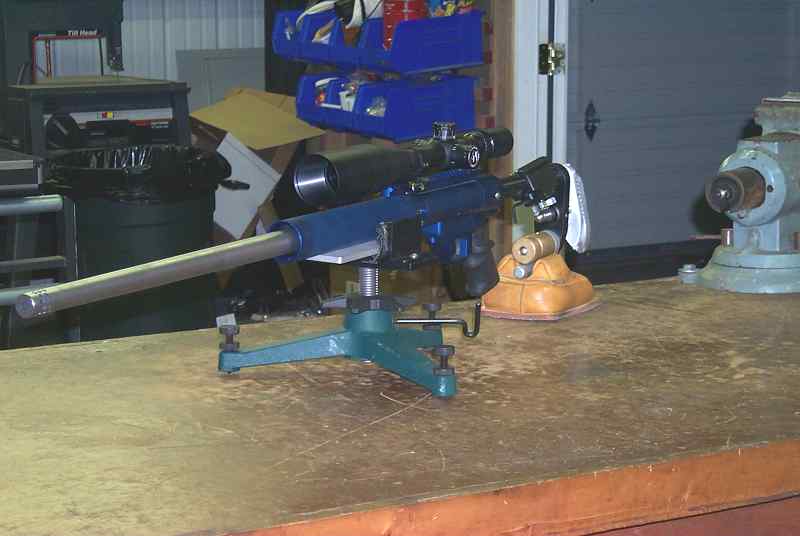
Front and Rear Bag Rails
The tubegun is
designed for hand held shooting using iron sights. My shooting
at live varmints on off the bench requires the use of front and
rear bags. I designed and built a set front and rear bag rests
to accomplish this purpose.
First
Model for Front Rail- Aluminum Plate Design
The front rest is a
simple aluminum plate, made from 0.250” stock. It is about 3”
wide by 7” long. It is machined with a narrow ridge along the
centerline that fits into the hand stop slot in the tubegun
front hand guard tube. A set of T nuts made to fit the slot were
made from Delrin, and tapped 10-32. I have found that the rifle
likes to be supported as near the receiver as possible, so I
have slid the front rest plate as far back along this slot as
possible. This works perfectly in my Sinclair benchrest top.

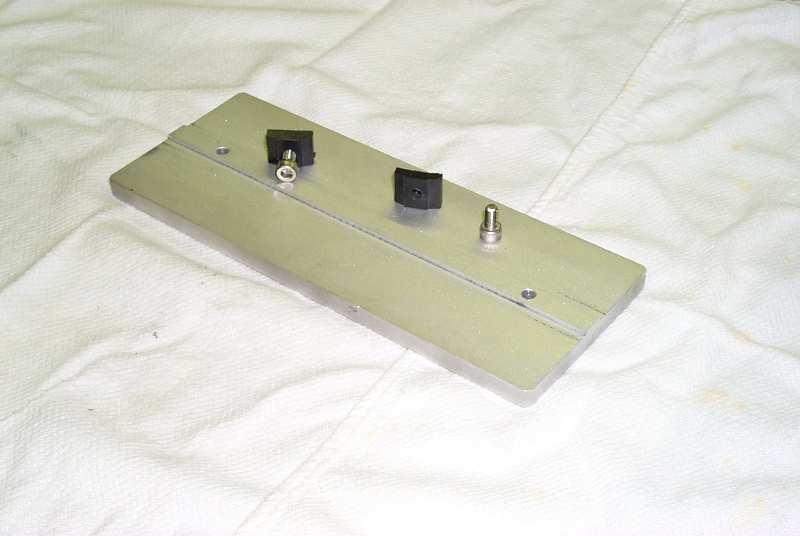
Second
Model for Front Rail - Acetal (Delrin) Box Design
(4/15/06)
I was not completely
happy with the tracking performance of the aluminum plate
design, so I built up a three inch wide box using some slippery
acetal (trade name Delrin) plastic and some 10-32 capscrews. I
used the same T nuts to hold it to the TubeGun front hand grip
tube. This design tracks much better in the front rest, and is
very slippery, providing a smoother recoil characteristic and
making it much easier to return to battery after each shot.


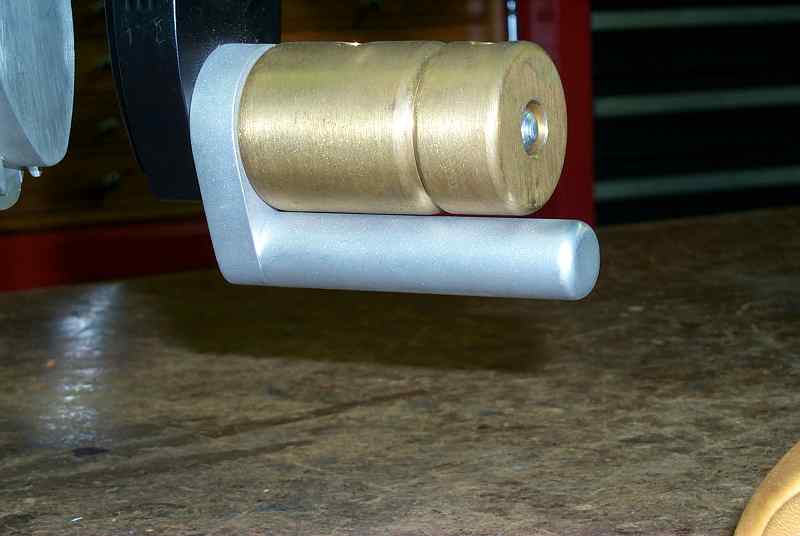
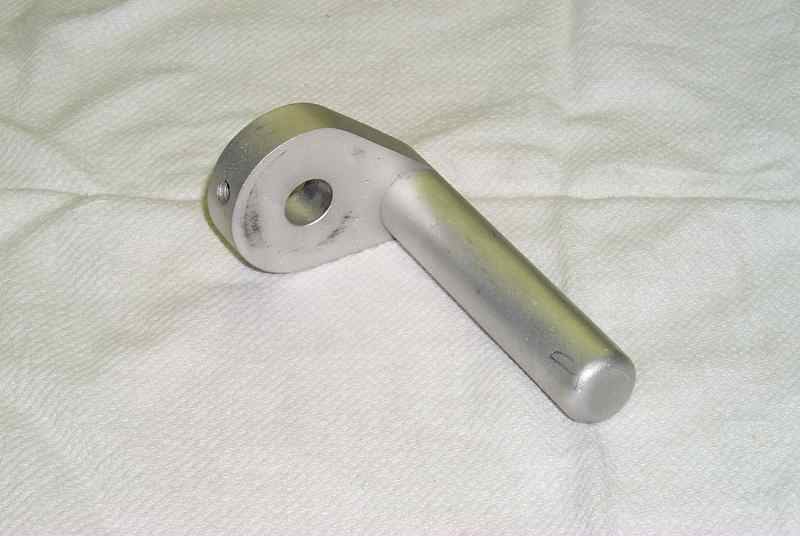
Rear Bag Rail
The rear bag rail is
added to the Ironstone competition butt stock using the weight
rail as the attachment point. It is a two piece affair made from
aluminum, with a 5/8” rod that tracks in the rear bag perfectly.

New and
Stiffer Front Tube Assembly 4/26/07
I have never been
satisfied with the stock front hand guard tube assembly. While
perfect for offhand irons prone shooting, it was not stiff
enough for F-Class shooting from a rest, especially with heavy
contour barrels. There was quite a bit of bounce and flex,
making it a difficult to get consistent group performance. It
worked best with a very hard hold on the handgrip, and with the
butt stock hard into the shoulder. Free recoil did not work well
at all. I have been pondering how to make this assembly stiffer
so that the rifle will be able to perform well with a light hold
or free recoil technique.
While fitting the
rifle with a new Bartlien 5R, 8.5" twist, 1.25" straight
cylinder contour 6.5mm barrel, chambered in 6.5-284, I decided
to make a new hand guard and front stock assembly. The goal was
to make it as stiff as possible, and still keep the overall rifle
weight under the 10kg F-Class Open weight limit.
I settled on a
composite assembly, consisting of two aluminum tubes, 0.125" in
wall thickness, bonded together with epoxy, and then machined to
fit the receiver sleeve. The inner tube had an ID of 1.75", to
fit the Tube Gun receiver sleeve. The outer tube as a piece of
aluminum pipe, also 0.125" wall, that just fit over the smaller
tube, with about 0.030" clearance. Devcon 10110 steel filled
epoxy was used to bond the two together. After fitting to the
receiver, and providing clearance slots for the front scope
Picatinny rail, and the attachment groove for the Delrin front
rest support, a (very) large number of 0.75" holes were milled through
using an end mill. This did not weaken the assembly, and took
off nearly half the assembly weight.


The assembled rifle
now weighs 9.860kg. The front rest is very solid, with no flex
or bounce. I got a little fancy with the bead blasting of the
barrel, just for fun. Break-in will commence this weekend, and
results will be posted back here..
|
